Application access
Login screen
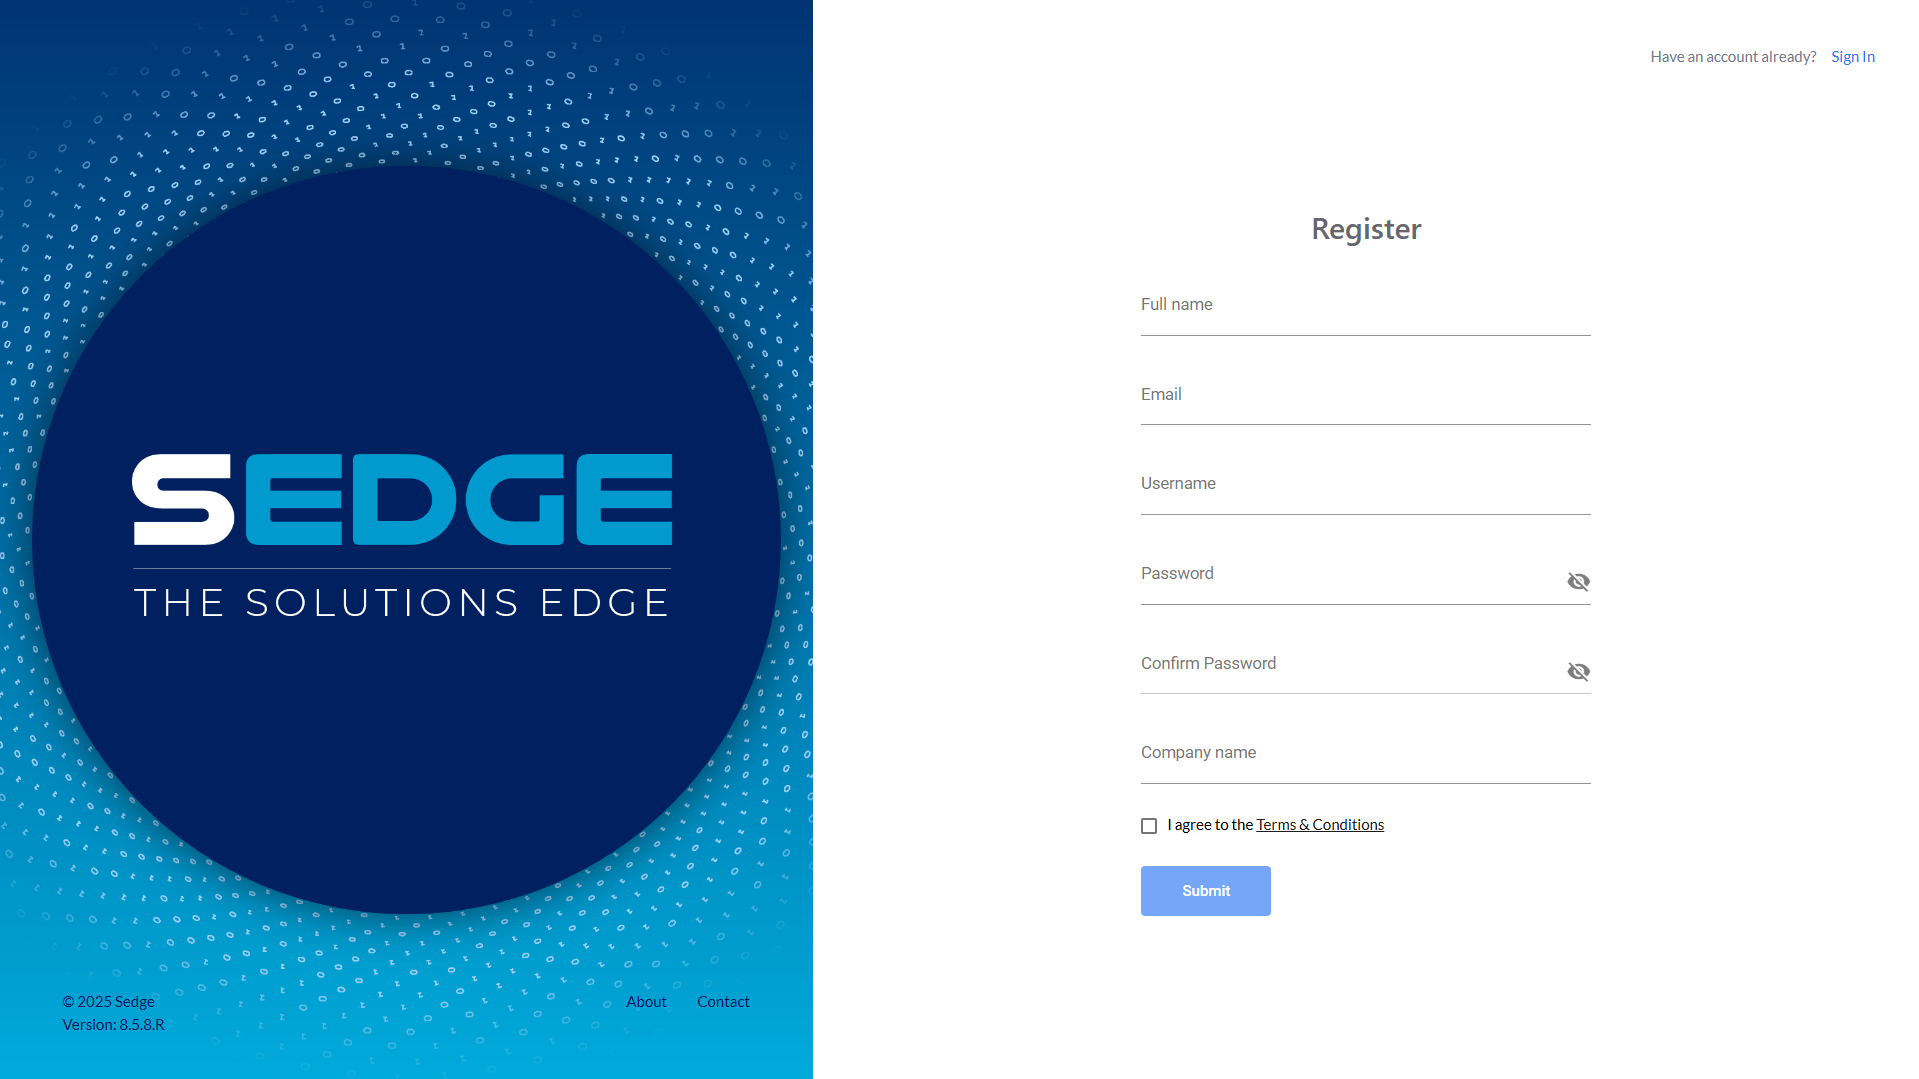
Signup and login
Welcome to Solvermind’s SEDGE!
A - You can sign up at https://analysis.sedge.ai/auth/register While signing up, fill in your full name, email, username, and select your password. The next step is to agree to our terms & conditions, and you are ready to go. An email will be sent with the activation link to your registered e-mail ID. Click on the link provided and this will take you to the login page.
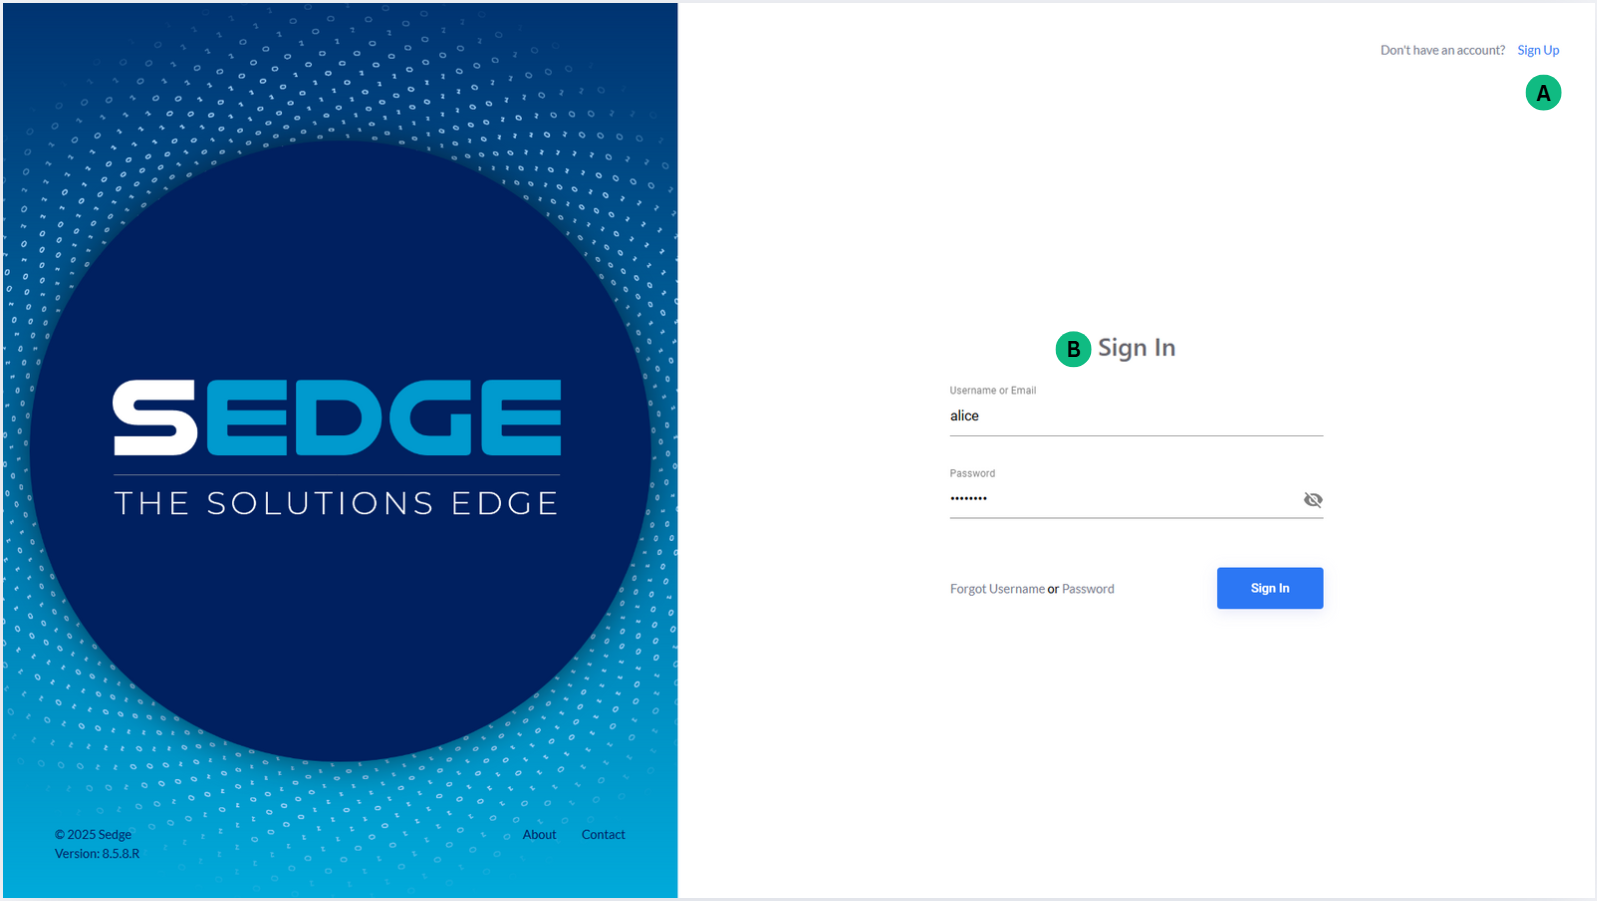
B - In the login page enter the username and password and you will be able to access the SEDGE application.
Forgot Username
If you have forgotten your username, you can click on the link “forgot Username”, next to the sign-in button.
Enter your email id and it will send an email with your username details to your email id.
In the login page enter the username and the password and you will be able to access the SEDGE application.
Forgot Password
If you have forgotten your password, you can click on the link “forgot Username or Password”, next to the sign-in button.
Enter your email id and click on the button “Reset Password”. It will send an email with password reset option to your email id. Click the link and it will take you to link reset password page, where you can reset your password by entering a new password.
In the login page enter the username and the new password and you will be able to access the SEDGE application.
If you need any support, contact us at sedgesupport@solverminds.com
User Management Workflow
- User Groups Setup:
- Admins can create and manage user groups under each company to organize users based on teams, departments, or specific roles. To manage user groups:
Select a company from the left-hand panel (e.g., EDGE, Solverminds).
The user groups under the selected company will appear on the right side.
You can edit a group name by clicking the pen icon or delete a group using the trash️ icon.
To create a new group, click on the + button at the bottom of the group list.
These groups help in logically segmenting users such as “HR team”, “Marketing”, or any custom teams like “EDGe”, making access management simpler and more efficient.
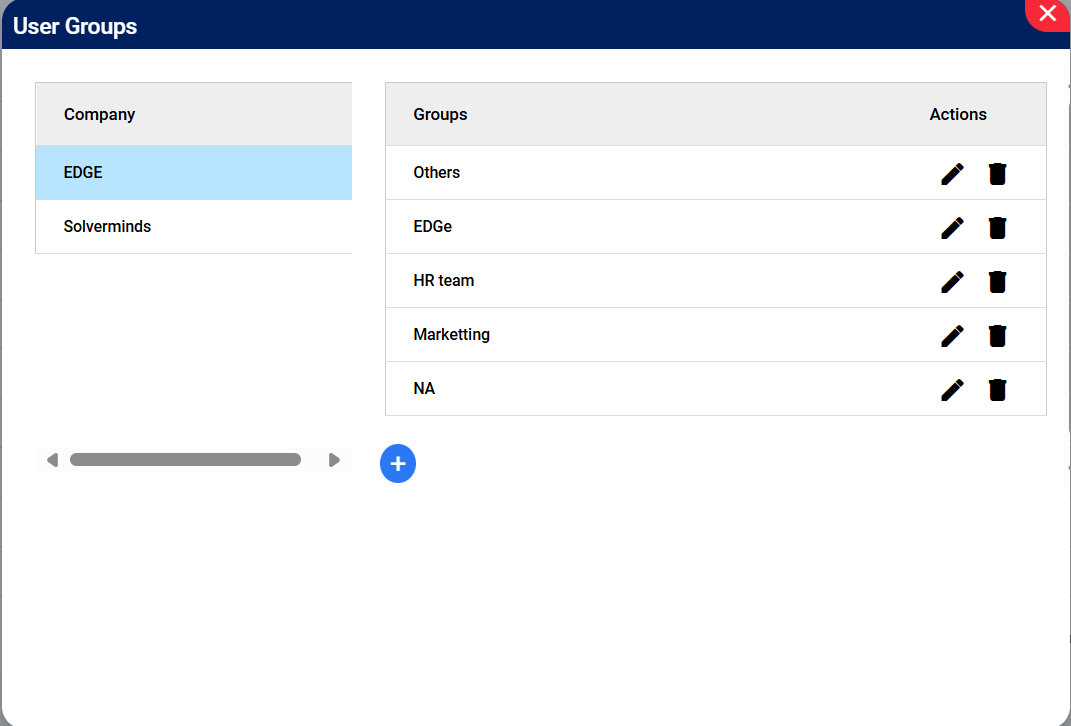
User Groups
- Adding a New User:
- Admins can invite users to the platform and assign them to a company and user group. To add a new user:
Go to the “Add User” tab.
- Enter the following details:
Full Name
Username
Company Name (select an existing company)
User Group (select from existing groups)
User Plan (if applicable)
Click on the “Invite” button to send the invite. You can click “Clear all” to reset the form.
- On the right-hand side, you can view the Invited Users Overview, which displays:
Username, Email ID
Activation status (Activated / Not Activated)
Date joined
Invited by
Current status (e.g., disabled)
This allows administrators to keep track of all invited users, monitor their activation status, and manage their access to the system.
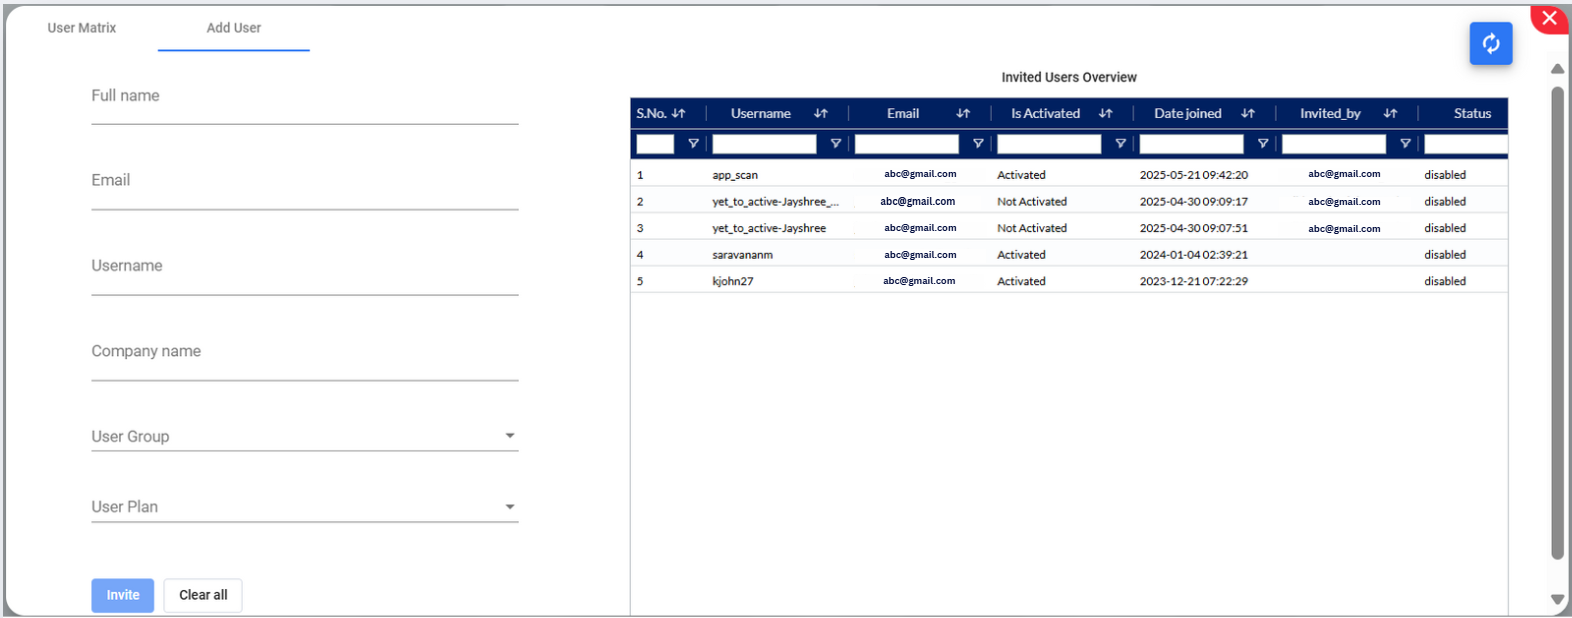
Add User